|
A common practice that teachers use to maximize their subscription is reusing quizzes to make a pre-test, and a post-test for a particular unit, lesson plan, objective, or set of standards. To create a pre-test you will add the questions that pertain the specific lessons you are teaching, from the CAERT Question Bank. To learn how to create a quiz, read our blog on creating and assigning quizzes. Most importantly, name your quiz "Pre-Test" Unit X or Pre-"Name of Unit X." 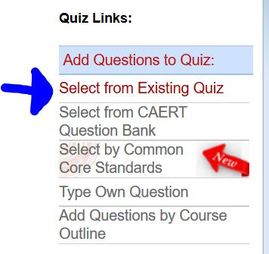 The post-test can be created using an existing quiz. First, create a new quiz. Most importantly, name your quiz "Post-Test" Unit X or Post-"Name of X Unit." Upon creating the quiz, you will be directed to the page to select questions from your quiz. There, you will find the question menu on the right side of the screen. Click the first option “Select from Existing Quiz”. Next, use the drop down menu to select the name of the quiz from which you wish to add questions.  Finally, select the boxes next to each question, and then click the “Add Selected Questions to Quiz” button. 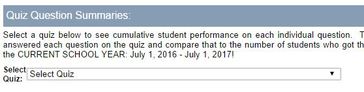 Utilizing the "Current School Year Report", you can view the students' scores from the quizzes/tests they have taken, between July 1 and June 30. The two most popular reports are: Quiz Question Summaries- This report shows how frequently a question is answered correctly or incorrectly to demonstrate validity and reliability and to indicate what concepts might require additional reinforcement.  Quiz Scores - This report lists all of the individual quizzes you have given to your students. Clicking on the name of any quiz will bring up a page listing the student scores for that quiz. It will also show if a student has taken the quiz more than once. You can click on the View Student Quiz Summary column to see each individual submission by a student. 
0 Comments
Previously, we have highlighted our Course Outline tool, and the lesson plans. This blog will concentrate on E-units, PowerPoints and additional files. We previously operated as an agricultural education textbook publisher started in 1932. When we created MYcaert.com we saw a need for digitized student texts which allow for easy updating. We went a step further and divided our digital texts into short, distinct content units we call E-units. Each lesson plan is accompanied by at least one E-unit of six to eight pages in PDF. When you create a course outline, you also create a customized digital textbook for your students.  In every E-unit the reader will find:
 Along with the E-unit, each lesson contains a PowerPoint file that can be edited for your classroom presentation format, or assigned directly to students. The content-centered PowerPoints were created by teacher request, with the intent to assign directly to students who missed class. 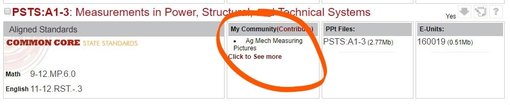 MyCommunity offers a vehicle for MYcaert users to share useful supplementary materials. You are able to upload documents to share or download materials other teachers prepared. For more information, read this blog or click on the MyCommunity Tab. The E-units, checking your knowledge questions, PowerPoints, and other materials can be assigned to students. Read this blog on how to assign materials in MYcaert. The materials can also be assigned via Google classroom, or other digital formats that are password protected.
 Previously, the Course Outlines feature was highlighted. Today’s blog will focus on the lesson plans. Each lesson plan has been written by a practicing teacher in the designated content area. The lesson plans have then been aligned to national academic standards, and some state content standards. A lesson plan is downloaded in PDF format, where specific parts may be printed for teacher use. To view the lesson plan, click on the red title of the lesson. To download to your computer, click on the grey arrow right of the title. Common best practices of applying the lesson plan are: 1) Content and background knowledge 2) Utilizing the Sample Test and Labs, and Assigning to Students 3) Utilizing the Visuals 4) Adding to My Community 5) Standards Alignment 1) Content and Background Knowledge- The lesson plans are content centered to ensure you have the depth of knowledge needed for the activities. Technical terms are highlighted to guarantee clear definitions. 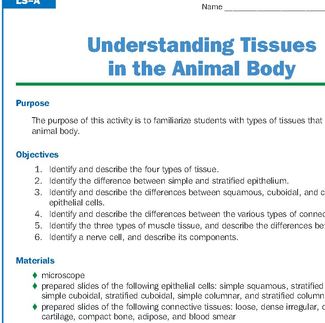 An example of a lab activity. An example of a lab activity. 2) Utilizing the Sample Test and Labs, and Assigning to Students- The sample test is a favorite feature in MYcaert. It can be printed on paper, or filed electronically and assigned through MyFiles in MYcaert, or through Google Classroom. We find teachers use this in a variety of ways - as a test, as a review for a test, or as a worksheet - saving them valuable preparation time. At the end of each lesson plan, a hands-on application is provided, and may contain more than one. Teachers utilize these similarly to the sample test. 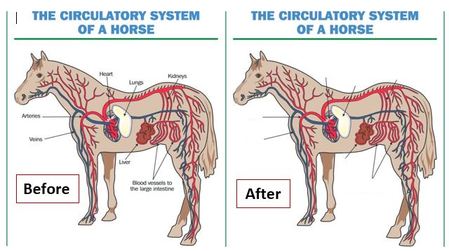 3) Utilizing the visuals- The visuals make for great handouts or note aides. They can be printed, and edited to fit your needs. For example, if using an identification visual, you may remove the names of the body parts, and guide students in note-taking. 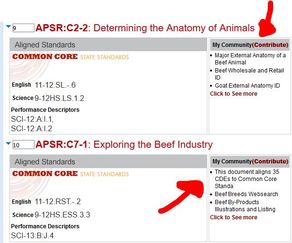 4) Adding to My Community - Teachers may create or add additional items valuable to the lesson with My Community. Be sure to review and make the items your own. If you have an activity or handout to add, please do. Be sure it is not copyrighted. Check out a previous blog on My Community. 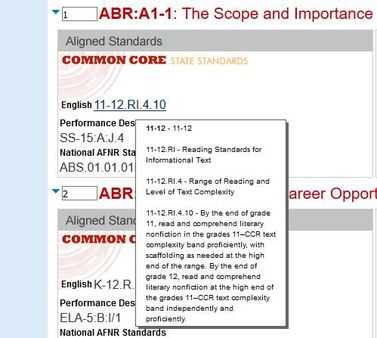 5) Standards Alignment- Each lesson plan is aligned to national academic and AFNR standards. Certain states have lessons aligned to state standards or pathways. MYcaert.com provides you the option to print out those standards you teach. Check out a previous blog on Standards Alignment.
Would you rather watch a 3 minute tutorial instead? See our Windows Movie Video at the end of this blog entry. 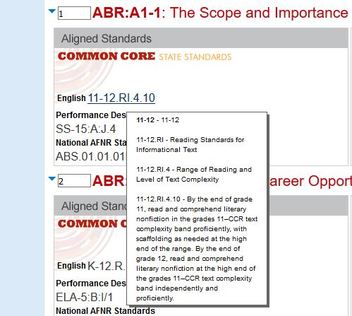 After you’ve created a course, you may want to view the standards aligned to the lessons in the course. This is a simple task. The standards are viewed in four simple ways.


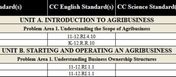
 If you are searching for lessons aligned to specific standards, you can do so by hovering over “My Courses” and selecting the area of study desired (IE: National AFNR, National Math, National Science, National English, or State Standards). By following the prompts, you will find the lessons aligned to those standards.
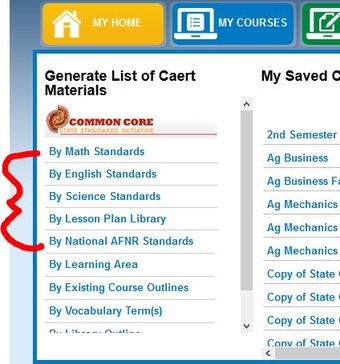
In a previous blog post, we asked you to tell us what you would like to see in upcoming blogs. One request was “Best Practices” within MYcaert.com. Recently, we’ve received a few requests on how to create a course. This blog will focus on the best practice of creating a course, and example courses. 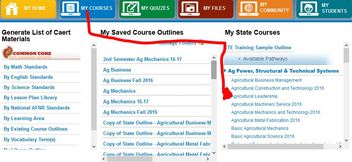 Upon logging into MYcaert, you will land on a screen with each subscribed library shown. From this screen you have several options to create a course. A very simple option, is to create a course from a sample course outline. By hovering over My Courses, you will find several Sample Course Outlines to the right. You can select one of those course outlines, and select “Make a copy and save it to my courses”. You can rename the course, reorder the lessons, and remove lessons, or add additional lessons to the outline. 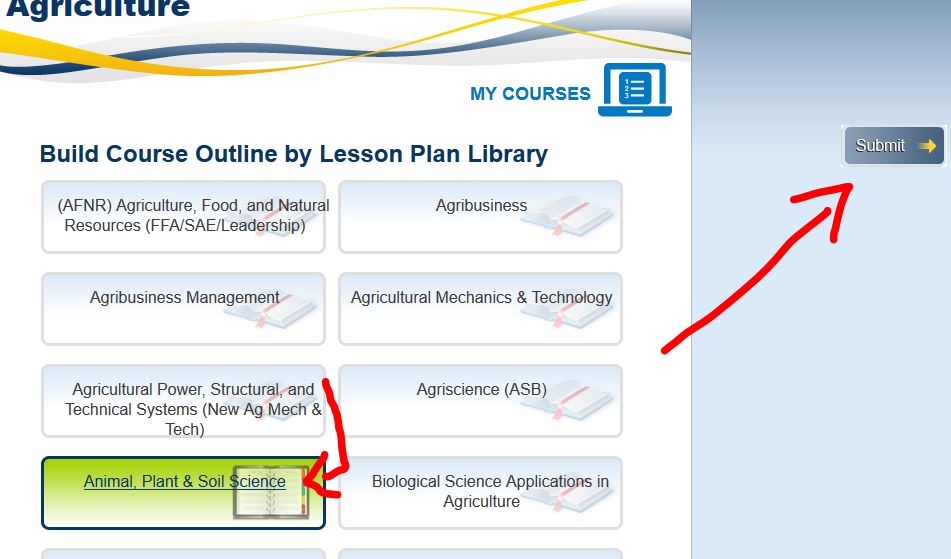 Another way to create a course, from home screen, is selecting a library. For example, select Animal, Plant, and Soil Science. The following screen allows you to select the desired problem areas, taking you to the final screen to show you your lesson plan choices. Select the lessons you wish to save to your course outline, and create your custom course outline. 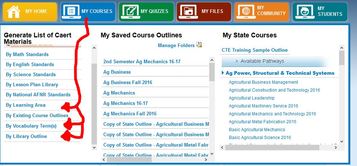 You can also create a course outline by vocabulary term, academic standard, or library outline. By using the Library Outline feature, you can use more than one library to create a course. This allows you to add in FFA and Communication lessons to any standard agriculture class.
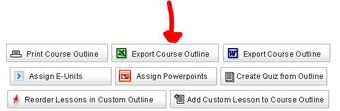
In MYcaert.com you are not limited to what lessons you can put into an outline. A recommended number is 60-65 lessons for a school year. Check out our brief video tutorial, showing you how to create a course outline! Examples Courses: Non- Ag CTE Courses Business and Technology Concepts Business Marketing and Computer Education Computer Concepts and Software Applications Care & Learning Services Occupations SCCO Child Development and Parenting SCCO Culinary Occupations I SCCO Nutrition and Culinary Arts I SCCO Nutrition and Wellness Occupations SSCO Culinary Occupations II SSCO FCS Communications Health Science Technology Drafting and Design Green Construction Manufacturing and Production Technology & Engineering Education AGRICULTURE Courses Agricultural Biotechnology Agricultural Business Management Agricultural Communications Agricultural Construction and Technology Agricultural Leadership Agricultural Machinery Service Agricultural Mechanics and Technology Agronomy Agricultural Metal Fabrication Agricultural Sales and Marketing Animal Science Aquacultural Science and Technology Basic Agricultural Mechanics Basic Agricultural Science Biological Science Applications in Agriculture- Animal Science Biological Science Applications in Agriculture-Plant Science Environmental Science Food Science Technology Greenhouse Production and Floral Design Horticultural Production and Management Introduction to the Agricultural Industry Landscaping and Turf Management Natural Resources Management and Conservation Physical Science Applications in Agriculture Veterinary Technology  With end of the semester exams around the corner, your mind is probably split between two places: creating semester exams, and preparation for 2nd semester. The past few blogs we have highlighted different ways you can re-use your quizzes- specifically, creating a quiz from existing quizzes. This feature is particularly useful for semester exams, choosing questions to compile from all the different quizzes you’ve previously assigned. You can also create a review quiz, with multiple chances for your students to view and submit. If you have already created your semester exams, you are likely preparing for second semester. As the first semester progressed you likely found that lessons may have taken longer, or took less time, depending on the topic and knowledge base of your students. In either case, you may need to reevaluate your course outlines for the second semester. To change a course outline for second semester, hover over My Courses and select the course outline you wish to change. Upon the course outline page, select the “Make a Copy of this Course Outline”.  Upon the next screen you will rename the course outline for the second semester. In this example, I used “2nd Sem 16-17” after the original course name. You can now make changes to this course outline, without losing what you planned at the beginning of the year. You can delete the lessons you’ve already taught, along the right edge of the course outline. You can also reorder the lessons by selecting “Reorder Lessons in Custom Outline”. On this screen you can move the lessons by clicking and holding on the lesson you want to move, and dragging it to the slot desired. At the bottom of the screen, you must select “Submit” for the changes to take place.  Want to see a quick video tutorial on this topic instead? Give yourself 3 minutes to watch this video!
 At this point in the year, it is common to reuse your quizzes. Our last blog showed you how you can reuse quizzes for other classes; however this blog, will show you that you can create a semester exam re-using your quizzes from the semester. Follow these simple steps below.
 3. On the next screen, use the drop down menu to select the name of the quiz below from which you wish to add questions.
4. Select the boxes next to each question, and then find the “Add Questions to Quiz” button. 5. If you wish to add more questions, you may do so following steps 2-4. Please see this video for a quick tutorial, via a recording from Citrix Webex. You may need to download a simple player to view. Best wishes on a successful exam season!  As a MyCAERT user, did you know that you had access to “tried and true” resources like worksheets, keys to worksheets, guided notes, labs, and hundreds of other resources in MyCommunity?! Teaching in Career and Technical Education, planning and preparing quality lessons and activities for multiple preps can be difficult. As a former agriculture teacher, I know I was relying heavily on what I heard "was the best" from other teachers, knowing adjustments would be made to the activity for my classroom.  Resource sharing with teachers is one of the most valuable forms of professional development as a teacher, for themselves and for others. MyCAERT provides a resource sharing area, known as MyCommunity. MyCommunity was developed to provide teachers with a mechanism to share, and search for materials shared by other teachers, that would supplement the MyCAERT materials. These materials are aligned to lesson plans, for easy access, once a course outline is created.  Starting, TODAY, we are hosting a special promotion if you upload an item in the next two weeks, and are attending 2016 National FFA Convention. If you upload any additional resource in MyCommunity Monday September 19- Sunday September 30, 2016 we will have a special item for you at our booth in Teacher’s World (Booth #1959). After you've uploaded the item, please do one of two things: 1) Head over to our Facebook page- and "Like" us while you're there because we like you, too- and post on our timeline the title of your resource, and in what Lesson Plan it can be found! OR 2) Email Kathy Novotney ([email protected]) and share the title of your resource, and in what Lesson Plan it can be found! We value your willingness to share your resource to other teachers! For directions on how to share, please see below! 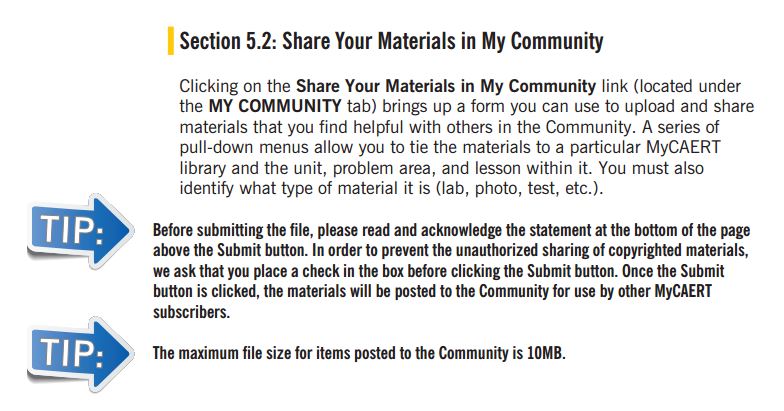 |
AuthorsDan Pentony Archives
October 2017
Categories
All
|
||||

 RSS Feed
