 MYcaert.com allows you the opportunity to control and maintain assignments remotely. For example, if your students finish reading their e-units and completing their assigned homework sooner than you planned, you may assign more work or a pop-quiz! To begin, this is a simple 4-step process. See the pages mentioned in the User’s Guide,: 1)Build a Course Outline (pg. 7), or blog link 2) Add Students (pg 14) or blog link 3) Manage Course Rosters (pg 15-16) 4) Assign/ Maintain E-Units and PowerPoints (pg 18-19) TIP: If your school utilizes Google Classroom, please see our blog that explains how to use the Google Single-Sign-On.  It all starts with a course outline. You will need to build one in order to assign e-units and PowerPoints. For additional help, you can see a short video tutorial here! Each Eunit contains:
 Having troubles assigning Eunits? If your students are unable to see assigned Eunits, it is likely that you are are using a previous course outline. To resolve this issue, follow these steps:
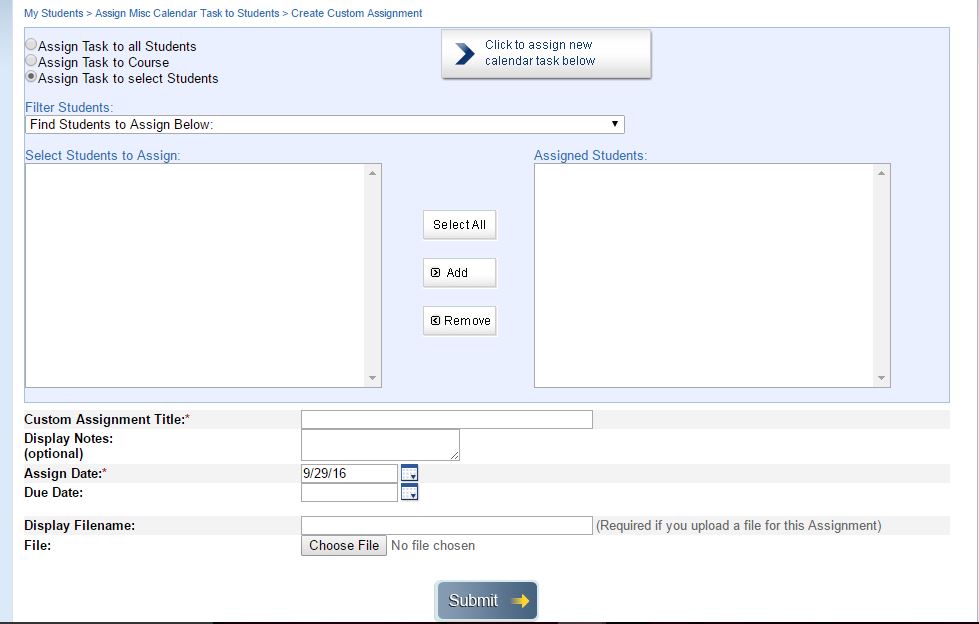
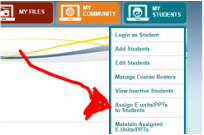
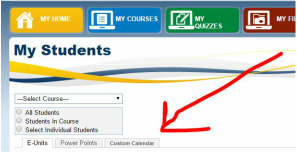
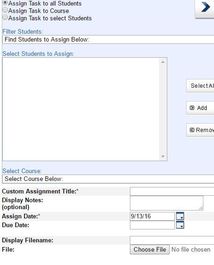 Customized/Personal Assignments You can also add customized dates and assignments to student calendars. For example, you may have assigned a project for students in a specific course. The calendar will allow you to add important deadlines, and important documents for the student(s) to view, in the Custom Calendar! Under my students, click “Assign E-units/PPTs to Students.” Then, click the “Custom Calendar.” Then, designate the student(s) who will see the task or assignment, and upload any important documents. Like us on Facebook for a daily tips, tricks, and special announcements!
0 Comments
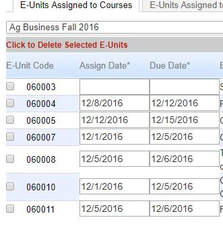
 Have you renewed your subscription for this school year? Renew your Agriculture or CTE libraries, and place your orders here. Schools are back in session nationwide, and we have put together a list of our top three back- to-school practices in MYcaert. 1) Copying Course Outlines Teachers will copy a course outline, instead of creating a one, to separate the annual results from assessments. Copying course outlines from a previous year is a simple task. Under My Courses, select the course outline you wish to duplicate. On the course outline page, select the “Make a Copy of this Course Outline”. Next, you will rename the course outline for this year. You can make changes to this course outline- adding or deleting lessons. You can also reorder the lessons by selecting “Reorder Lessons in Custom Outline”. On this screen you can move the lessons by clicking and holding on the lesson you want to move, and dragging it to the slot desired. At the bottom of the screen, you must select “Submit” for the changes to take place. 2) Adding Students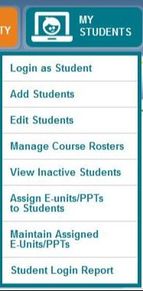 Once you have created your cours(es), you can add students. We just made a major adjustments to the "Add Students" page that will help Google Education Schools. Review the single sign-on for Google users here. Simply add new students underneath the "My Students" tab. You may add up to 15 at one time. "Manage course rosters" underneath "My Students" to review all your students are in the correct courses. 3) Assigning EUnits- Updating Assigned Dates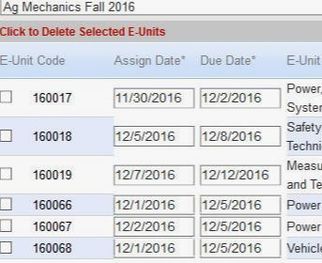 If you reuse a course, instead of making a copy, this is important. Under "My Students", select "Maintain Assigned E-units/PPTs". On the following screen, select maintaining E-Units or PowerPoints. The process is the same for each. Next, select a course in the box provided. Finally, remove the assign and due dates and click "Save Updated Status to Assigned/E-Units or PowerPoints". Like us on Facebook for a daily tips, tricks, and special announcements!
Have you renewed your subscription for this school year? Renew your Agriculture or CTE libraries, and place your orders here.At the start of a school year, it is important for you to be prepared. In order to feel most prepared using MYcaert.com, we are sharing some recommended practices to ensure a smooth transition into the school year. 1) Create courses 2) Adding students 3) Assigning materials 1) Create Courses If you are new to MYcaert.com, and are unfamiliar with the various ways of creating courses, review this previous blog on Creating Course Outlines. Perhaps you would like to reuse course outlines from last year, you will simply "Make a Copy of Course Outline".  Follow these simple steps: Under My Courses, select the course outline you wish to duplicate. Upon the course outline page, select the “Make a Copy of this Course Outline”. Upon the next screen you will rename the course outline for the second semester. In this example, I used “2nd Sem 16-17” after the original course name. You can now make changes to this course outline. You can delete the lessons you’ve already taught, along the right edge of the course outline. You can also reorder the lessons by selecting “Reorder Lessons in Custom Outline”. On this screen you can move the lessons by clicking and holding on the lesson you want to move, and dragging it to the slot desired. At the bottom of the screen, you must select “Submit” for the changes to take place. 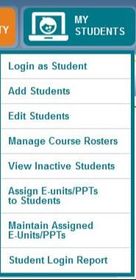 2) Adding Students Once you have created all your courses, you can add students. We just made a major adjustments to the "Add Students" page that will help Google Education Schools. Review the single sign-on for Google users here. Simply add new students underneath the "My Students" tab. You may add up to 15 at one time. "Manage course rosters" underneath "My Students" to review all your students are in the correct courses. 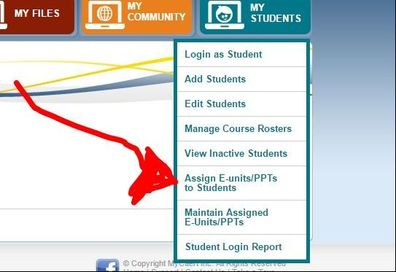 3) Assigning Work
Review the User’s Guide, pages 18-19. - Assign/ Maintain E-Units and PowerPoints It all starts with a course outline. You will need to build one in order to assign E-units and PowerPoints. For additional help, you can see a short video tutorial here. You can also add customized dates and assignments to student calendars. For example, you may have assigned a project for students in a specific course. The calendar will allow you to add important deadlines, and important documents for the student(s) to view, in the Custom Calendar. This option is also found underneath "Assign E-units/PPTs to Students".  Over the last year, we heard from several teachers who utilize Google Classroom. MYcaert.com has implemented a Google Single-Sign-On, SSO, option for students. This is a secure authentication system that enables Google users to sign in with their Google account logins. Students will not have to remember their MYcaert.com logins and passwords. They will click the Google icon to log in. How To When you add students to your account, you have an option to select Google Enable. Once you click "Yes" in that column, you will add the student's Google e-mail address. This can be their personal Gmail account, or their Google education account. 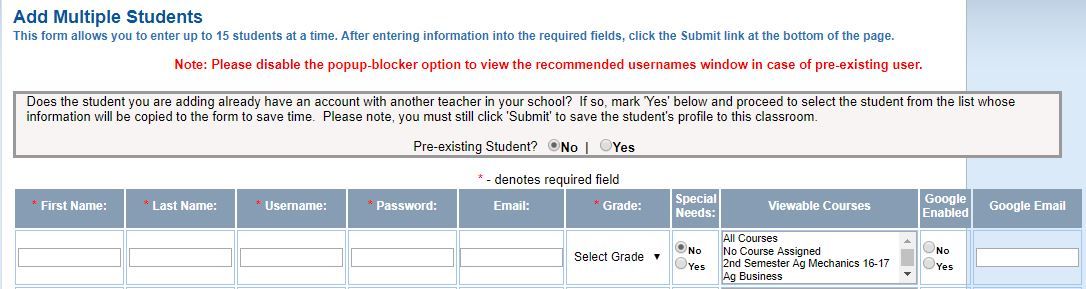 If students are already in your roster, you will select "Edit Students" underneath the "My Students" Tab. Click the student's name you wish to edit, and then you will have the option to enable the Google SSO. 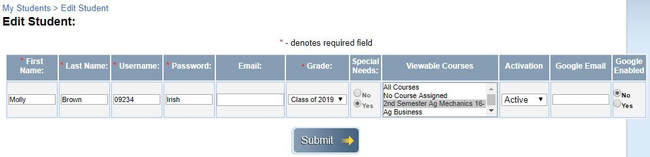  Special Student Note: When students login for the first time with this feature on a device they will have to click the Google G "Sign In" button. When returning to MYcaert.com, the browser will do a quick search to ensure they are logged in to their Google account. Perks The SSO will allow you to assign links to e-units and online assessments in Google Classroom. The students can click the links and be taken directly to those assignments. The SSO also removes inconvenient steps in assigning materials to students. Assessments and materials remain password protected, and you remain able to track student attainment via academic standards. Do you have a suggestion for MYcaert.com to consider? Please provide your feedback here to help us track helpful suggestions.
Previously, we have highlighted our Course Outline tool, and the lesson plans. This blog will concentrate on E-units, PowerPoints and additional files. We previously operated as an agricultural education textbook publisher started in 1932. When we created MYcaert.com we saw a need for digitized student texts which allow for easy updating. We went a step further and divided our digital texts into short, distinct content units we call E-units. Each lesson plan is accompanied by at least one E-unit of six to eight pages in PDF. When you create a course outline, you also create a customized digital textbook for your students.  In every E-unit the reader will find:
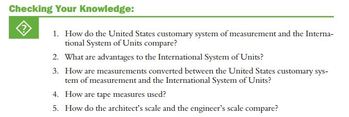
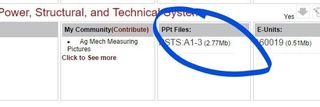 Along with the E-unit, each lesson contains a PowerPoint file that can be edited for your classroom presentation format, or assigned directly to students. The content-centered PowerPoints were created by teacher request, with the intent to assign directly to students who missed class. 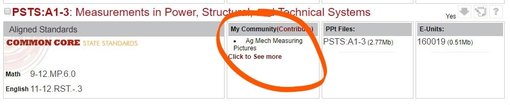 MyCommunity offers a vehicle for MYcaert users to share useful supplementary materials. You are able to upload documents to share or download materials other teachers prepared. For more information, read this blog or click on the MyCommunity Tab. The E-units, checking your knowledge questions, PowerPoints, and other materials can be assigned to students. Read this blog on how to assign materials in MYcaert. The materials can also be assigned via Google classroom, or other digital formats that are password protected.
 Do you create your own assignments and worksheets? Do you use and assign materials from MyCommunity for your students? MyFiles, the red tab in MYcaert, is a great place for you to store your assignments, PowerPoints, and your own teacher files for each lesson and/or unit. 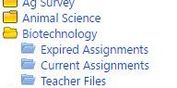 Once you have created a course outline, your MyFiles automatically updates to include an overall file for the course. The overall course file, includes three smaller files: “Current Assignments”, “Expired Assignments”, and “Teacher Files”. You can store your files for your courses within the online MYcaert portal. What could be better to have all of your materials in ONE location? 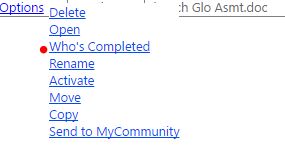 Once you have uploaded files into the correct folders, and assigned materials to students, you can actually view who has completed and turned in the assignments. You are also able to grade and comment on your students’ completed assignments. If you find materials within MyCommunity that you find beneficial for your class, you can also directly save those materials to “MyFiles,” by selecting the resource, and then selecting the course. 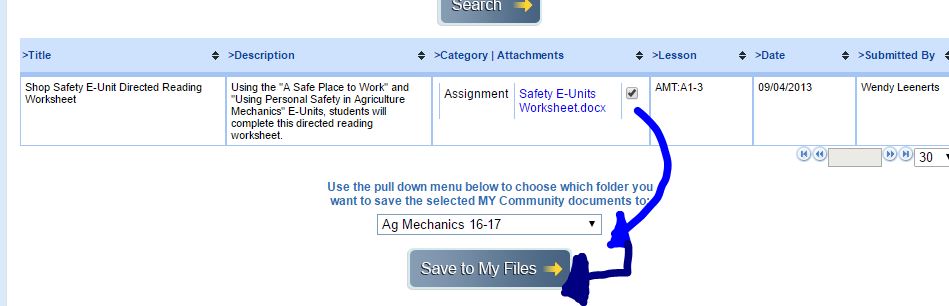 If you have more questions on how to use it, check out Section 6 of the User’s Guide for step by step directions. You can also check out this quick video tutorial!
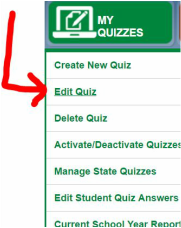 Have you created a quiz for one class, that you would like to assign to another? For example, you may want a shop or lab safety test to be passed by all your students, not just the Mechanics students. Or maybe you are quizzing your students on a guest speaker that came to all of your classes. However you need this capability, it is a very easy process. First, hover your mouse over the MyQuizzes tab, and click “Edit Quiz”. After selecting a quiz to edit, it will be displayed on the screen, and several sections of links will be available on the right side of the screen. Select “Edit Quiz Parameters.” This will be the third blue header on the right. 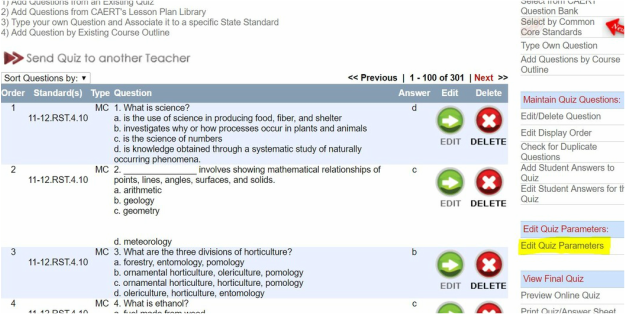 Once on the "Edit Quiz Parameters" page, you can select the course(s) you would like to assign the quiz to, by clicking the name. To select more than one course, hold the "Ctrl" key on PCs, and the "Command" key on Macs, while clicking the course names. You may also notice on the "Edit Quiz Parameters page," the option for student views and submissions. If you have assigned this quiz to a class but would like to give them more opportunities at successful completion, you can increase the number of times the students can view and submit a quiz. 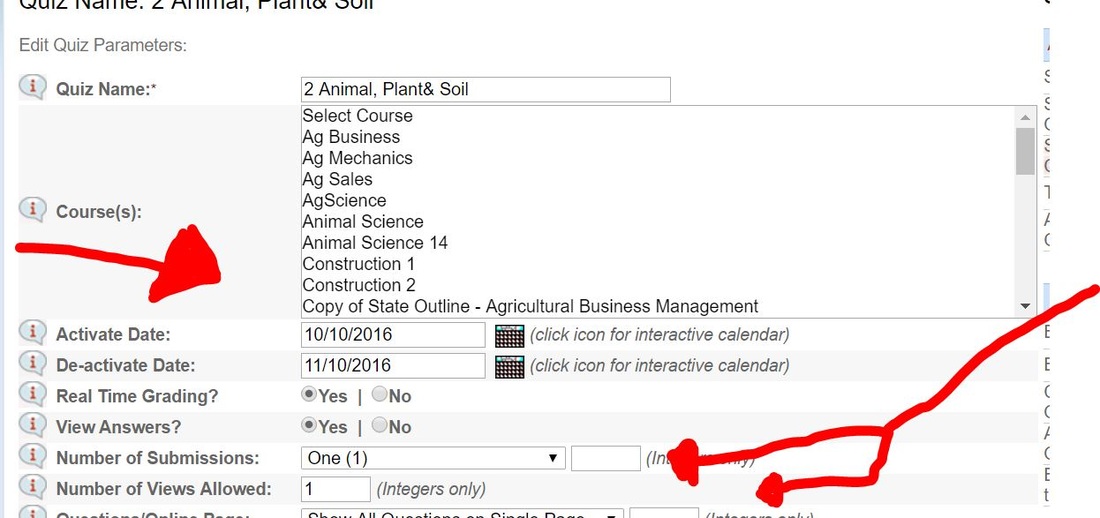 We love to meet our subscribers! If you are going to be in Indianapolis October 19-21st, please stop by booth #1959 in Teacher’s World at the Career Expo! Today’s, and next Monday’s Blogs relate how to best utilize MYcaert while you are at National FFA Convention. How do you plan to manage assignments and homework for your students while you are out? MYcaert allows you the opportunity to control and maintain assignments remotely. For example, if your students finish reading their e-units and completing their assigned homework sooner than you planned, you may assign more work or a pop-quiz! To begin, this is a simple 4-step process. See the pages mentioned in the User’s Guide: 1)Build a Course Outline (pg. 7) 2) Add Students (pg 14) 3) Manage Course Rosters (pg 15-16) 4) Assign/ Maintain E-Units and PowerPoints (pg 18-19) It all starts with a course outline. You will need to build one in order to assign e-units and PowerPoints. For additional help, you can see a short video tutorial here! You can also add customizable dates and assignments to student calendars. For example, you may have assigned a project for students in a specific course. The calendar will allow you to add important deadlines, and important documents for the student(s) to view, in the Custom Calendar!
 Need more info? Contact Kathy Novotney at [email protected]!
|
AuthorsDan Pentony Archives
October 2017
Categories
All
|
 RSS Feed
